Sending Emails Using Spring Boot and Kotlin
This blog demonstrates how to write an application to send emails with/without attachments using Spring Boot in Kotlin.
Requirements
- The application should be able to send a simple email (i.e. an email without attachments) to a valid email address.
- The application should be able to send an email with attachments to a valid email address. To provide a concrete scenario, we use two pictures found on the Internet as the attachments in this blog.
Design and implementation
The first step to create this application is to initiate an empty Spring project. This can be done via Spring Initializr. Note that it is integrated with IntelliJ IDEA Ultimate Edition, which makes it even more convenient for project initialization.
In Spring Initializr, we need to add Java Mail Sender (for the mailing functionality) and Spring Web (for testing) as the dependencies. As a result, the following artifacts will be introduced to the pom.xml file: spring-boot-starter-mail and spring-boot-starter-web.
To set up the “sender” of our emailing service, we can put the configurations in the application.properties file. (There should be an empty file of this name after the creation of the project.) If we use gmail as our sender, then we need to specify:
spring.mail.host=smtp.gmail.com
spring.mail.port=587
spring.mail.username=<username of gmail account>
spring.mail.password=<password of gmail account>
spring.mail.properties.mail.smtp.auth=true
spring.mail.properties.mail.smtp.starttls.enable=true
Port 587 is one of the “submission” ports for mail clients (e.g. the application we are working on).
One more thing we need to do is to enable the less secure app access of your Google account. Don’t forget to turn it off on time!
To represent the email entity, we can make use of the data class feature of Kotlin:
data class Email(
       val to: String,
       val subject: String,
       val text: String,
       val withAttachment: Boolean
)
The core part of this application is the EmailSenderService, which exposes the sendMail function for other classes to use. Depending on the value of the Boolean field withAttachment, sendMail will compose different emails by calling different functions:
fun sendMail(email: Email) {
   val msg = if (email.withAttachment) createMessageWithAttachment(email) else createSimpleMessage(email)
   emailSender.send(msg)
}
The implementation of creating the message is as follows:
private fun createSimpleMessage(email: Email): MimeMessage {
   val message: MimeMessage = emailSender.createMimeMessage()
   val helper = MimeMessageHelper(message)

   setupMessage(helper, email)

   return message
}

private fun createMessageWithAttachment(email: Email): MimeMessage {
   val message: MimeMessage = emailSender.createMimeMessage()
   val helper = MimeMessageHelper(message, true)
   val kotlinIconStream = URL("https://upload.wikimedia.org/wikipedia/commons/7/74/Kotlin_Icon.png").openStream()
   val springIconStream = URL("https://upload.wikimedia.org/wikipedia/commons/4/44/Spring_Framework_Logo_2018.svg").openStream()

   setupMessage(helper, email)
   helper.addAttachment("KotlinIcon.png", ByteArrayResource(IOUtils.toByteArray(kotlinIconStream)))
   helper.addAttachment("SpringIcon.svg", ByteArrayResource(IOUtils.toByteArray(springIconStream)))

   return message
}

private fun setupMessage(helper: MimeMessageHelper, email: Email) {
   helper.setTo(email.to)
   helper.setSubject(email.subject)
   helper.setText(email.text)
}
Testing
We can create an controller that maps an endpoint to a function sendEmail for testing purposes:
@Controller
class EmailSenderController(private val emailSenderService: EmailSenderService) {
   @PostMapping("/mail/send")
   fun sendEmail(@RequestBody mail: Email): ResponseEntity<Void> {
       emailSenderService.sendMail(mail)
       return ResponseEntity.noContent().build()
   }
}
Note that we are using constructor injection for Dependency Injection here. (Read more about it here.)
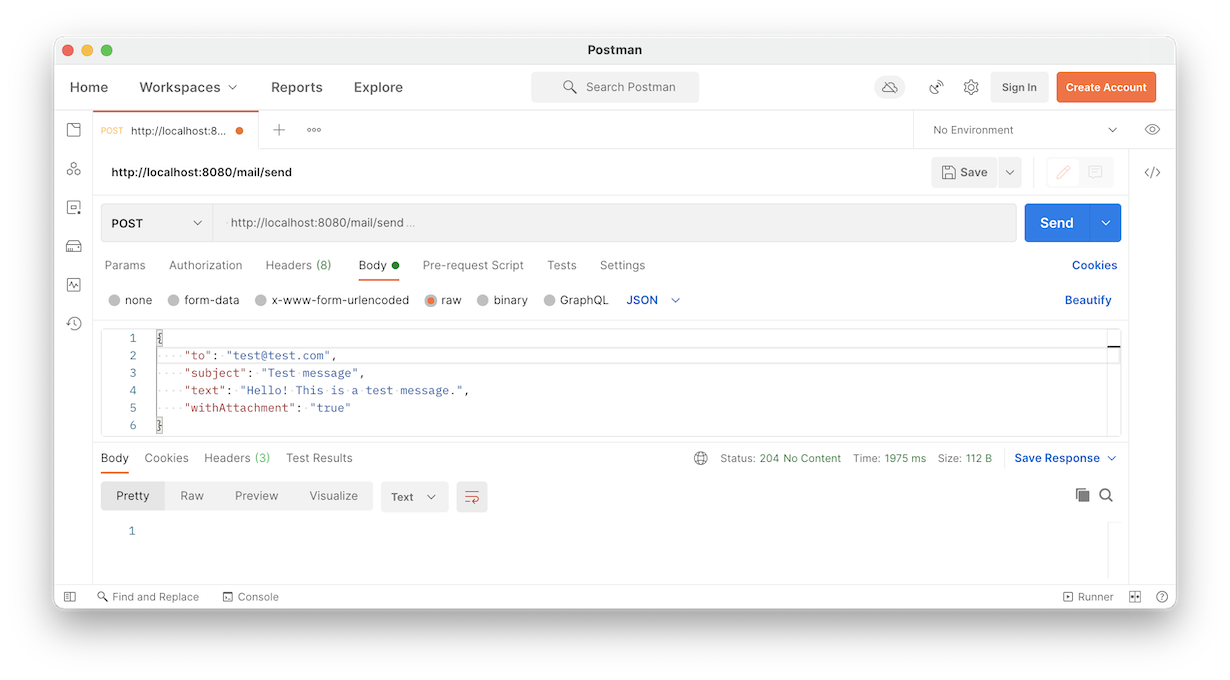
Then we use postman to send a POST request:

If this request is successfully made, there should be an email with two attachments in the mailbox of test@test.com.
Future work
The application demonstrated in this blog is pretty simple. There are many extensions that could be made to it, such as:
- Support for sending emails to multiple recipients;
- Support for choosing attachments instead of hardcoding them;
- Support for validating an email before sending it;
- And so on.